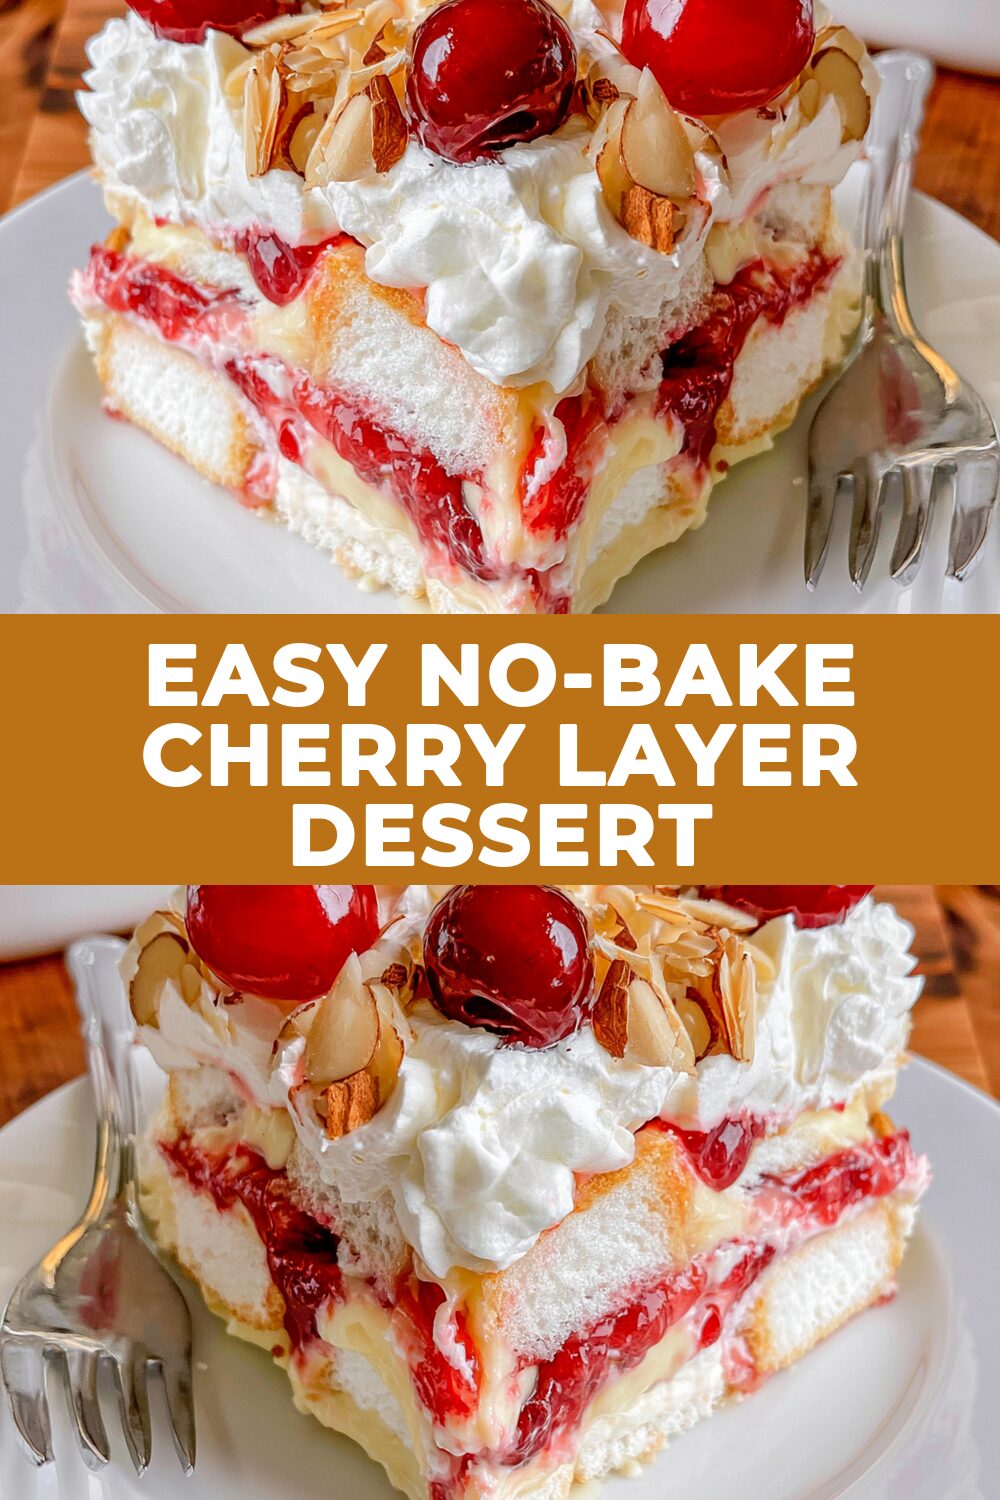
This delightful no-bake cherry dessert is a dream of fluffy, creamy layers and sweet cherry goodness, perfect for any occasion that calls for a touch of homemade magic. It’s wonderfully simple to assemble, making it a go-to for busy days or when you need a crowd-pleasing treat without the oven.
Imagine a dessert that practically assembles itself, offering pure joy in every bite with its light, airy textures and vibrant cherry flavor, all crowned with a delicate scattering of toasted almonds.
Recipe Details
- Flavor Profile: Sweet cherry, creamy vanilla, light and airy cake.
- Textures: Soft, melt-in-your-mouth cake, smooth pudding, pillowy whipped topping, and a hint of crunch from almonds.
- Total Time: Approximately 20 minutes active time, plus at least 6 hours chilling time.
- Difficulty: Easy. Perfect for beginners!
What You’ll Need
To create this beautiful layered dessert, you’ll be working with a base of tender angel food cake, a luscious cherry pie filling, a smooth vanilla pudding mixture, and a cloud-like layer of whipped topping. Toasted sliced almonds add a delightful finishing touch.
Ingredient Notes
- Angel Food Cake – A pre-made cake makes this recipe incredibly easy. Its light, airy texture is perfect for soaking up the flavors.
- Cherry Pie Filling – This provides the vibrant fruity punch. Using a 20-ounce can is just the right amount to get those lovely cherry swirls and layers.
- Instant Vanilla Pudding – The instant variety means no cooking is required, and it sets up beautifully with milk and sour cream for a smooth, rich filling.
- Whole Milk – Using whole milk helps create a creamier, richer pudding layer.
- Sour Cream – A touch of sour cream adds a lovely tang that balances the sweetness and contributes to the pudding’s smooth, luxurious texture.
- Whipped Topping – Thawed whipped topping is a convenient way to add a light, airy layer. You can also use homemade stabilized whipped cream if you prefer.
- Sliced Almonds – Toasting these brings out their nutty flavor and adds a delightful crunch. This is an optional but highly recommended garnish for texture contrast.
Add-ins and Substitutions
While this recipe is wonderful as is, you can certainly play around with it! For a deeper cherry flavor, consider adding a tablespoon or two of cherry juice concentrate to the pudding mixture. If you’re not a fan of almonds, you could skip them, or perhaps try a sprinkle of sweetened shredded coconut or even some finely chopped maraschino cherries for an extra pop of color. For a different fruit swirl, you could experiment with other pie fillings like blueberry or strawberry, keeping in mind that the color and flavor profile will change.
How to Make Easy No-Bake Cherry Layer Dessert
This dessert comes together with just a few simple steps, ensuring a beautiful and delicious result without any baking.
- Prepare the Cake Base: Begin by cutting your 14 ounces of angel food cake into bite-sized cubes. Arrange half of these lovely cake cubes evenly across the bottom of a 9×13-inch baking dish. This forms the first fluffy layer.
- Add the First Cherry Layer: Spoon half of your 20 ounces of cherry pie filling over the cake cubes. Gently spread it out, ensuring good coverage.
- Add the Second Cake Layer: Now, place the remaining angel food cake cubes on top of the cherry filling. This creates a second cake layer that will soak up more deliciousness.
- Make the Pudding Mixture: In a large bowl, whisk together the 3.4 ounce package of instant vanilla pudding mix, 1 1/2 cups of whole milk, and 1 cup of sour cream. Whisk until the mixture is completely smooth and no lumps remain. This creates your creamy filling.
- Spread the Pudding: Pour this smooth pudding mixture evenly over the layers of cake and cherry filling. Spread it gently to cover the entire surface.
- Add the Whipped Topping: Carefully spread the 8 ounces of thawed whipped topping in an even layer over the pudding.
- Create the Cherry Swirl: Spoon dollops of the remaining 10 ounces of cherry pie filling over the whipped topping layer. With a skewer or the tip of a knife, gently swirl the cherry filling into the whipped topping. Be delicate so you don’t disturb the pudding layer beneath.
- Pro Tip: Swirling gently is key here! You want distinct swirls of cherry, not a fully mixed layer, for the prettiest presentation.
- Chill to Perfection: Cover the baking dish with plastic wrap and refrigerate for at least 6 hours, or ideally, overnight. This crucial step allows the cake to soften and absorb the flavors, and the dessert to set beautifully.
- Garnish and Serve: Just before serving, sprinkle the 2 tablespoons of toasted sliced almonds over the top.
Recipe Tips
- Cake Cubes: Aim for roughly 1-inch cubes for the angel food cake. This size is easy to manage and ensures even distribution throughout the dessert.
- Smooth Pudding: Make sure to whisk the pudding mixture thoroughly until it’s completely smooth. Any lumps will be noticeable in the final dessert.
- Gentle Swirling: When swirling the cherry pie filling into the whipped topping, use a light hand. Too much agitation can cause the colors to blend more than desired, and you might even break through to the pudding layer.
- Chilling is Crucial: Do not skimp on the chilling time! This dessert relies on the refrigeration period to meld the flavors and achieve the perfect texture. Rushing this step will result in a dessert that is too firm and less cohesive.
FAQs
- Can I use a different type of cake? While angel food cake is ideal due to its light texture and ability to soak up moisture, a pound cake or even vanilla sponge cake could be used. However, the texture will be denser.
- How long does this dessert last? This Easy No-Bake Cherry Layer Dessert is best enjoyed within 2 to 3 days when stored covered in the refrigerator. The cake will continue to soften over time.
- What if I don’t have sour cream? Plain Greek yogurt can be used as a substitute for sour cream. It will provide a similar tang and contribute to the creamy texture of the pudding layer.
Serving Suggestions
This beautiful layered dessert is wonderful served on its own, allowing its sweet and creamy flavors to shine. It pairs wonderfully with a simple cup of coffee or tea. For a more indulgent treat, a small scoop of vanilla bean ice cream on the side can be a delightful addition, though it’s certainly not necessary.
Make This Recipe in Advance
This Easy No-Bake Cherry Layer Dessert is an excellent candidate for making ahead. In fact, it’s best when chilled for at least 6 hours. You can assemble the entire dessert up to 24 hours in advance and keep it covered in the refrigerator. The toasted almonds should be added just before serving to maintain their crunch. If you need to prepare components separately, you can cube the cake and toast the almonds a day in advance. The pudding mixture can also be made a few hours ahead and kept chilled, though it’s perfectly easy to make it right before assembling.

Easy No-Bake Cherry Layer Dessert
- Total Time: 6 hours 20 minutes
- Yield: 12 servings 1x
Description
Fall in love with this incredibly simple yet utterly delightful Easy No-Bake Cherry Layer Dessert. It’s a dreamy combination of light angel food cake, luscious cherry filling, and creamy vanilla pudding, all layered together for a show-stopping treat that requires absolutely no oven time. This dessert is perfect for potlucks, family gatherings, or just when you need a sweet escape.
Ingredients
14 ounces angel food cake
20 ounces can cherry pie filling divided
3.4 ounce instant vanilla pudding
1 1/2 cups whole milk
1 cup sour cream
8 ounces whipped topping thawed (or fresh whipped cream that has been stabilized)
2 tablespoons sliced almonds toasted, optional
Instructions
Cut the angel food cake into bite-sized cubes. Spread half of the cake cubes evenly across the bottom of a 9×13-inch baking dish.
Spoon half of the cherry pie filling (10 ounces) over the layer of cake, then top with the remaining angel food cake cubes.
In a large bowl, whisk together the instant vanilla pudding mix, whole milk, and sour cream until completely smooth and free of lumps.
Pour and spread the pudding mixture evenly over the cake and cherry layers.
Spread the whipped topping in an even layer over the pudding.
Spoon dollops of the remaining cherry pie filling (10 ounces) over the whipped topping. Gently swirl the pie filling into the whipped topping using a skewer or knife, taking care not to disturb the underlying pudding layer.
Cover the dish with plastic wrap and refrigerate for at least 6 hours, or overnight, to allow the cake to soak and set.
Sprinkle toasted sliced almonds over the top before serving.
Notes
Feel free to experiment with other fruit pie fillings like blueberry, strawberry, or even lemon! Just ensure they are about 20 ounces.
In season, you could fold fresh berries into some of the cherry pie filling for an extra burst of freshness.
A little bit of lemon or orange zest stirred into the pudding mixture can add a bright, refreshing note.
For an extra layer of texture and flavor, consider crushing some shortbread cookies or graham crackers and sprinkling them between the cake layers.
- Prep Time: 20 minutes
- Cook Time: 0 minutes
- Category: Dessert
- Cuisine: American