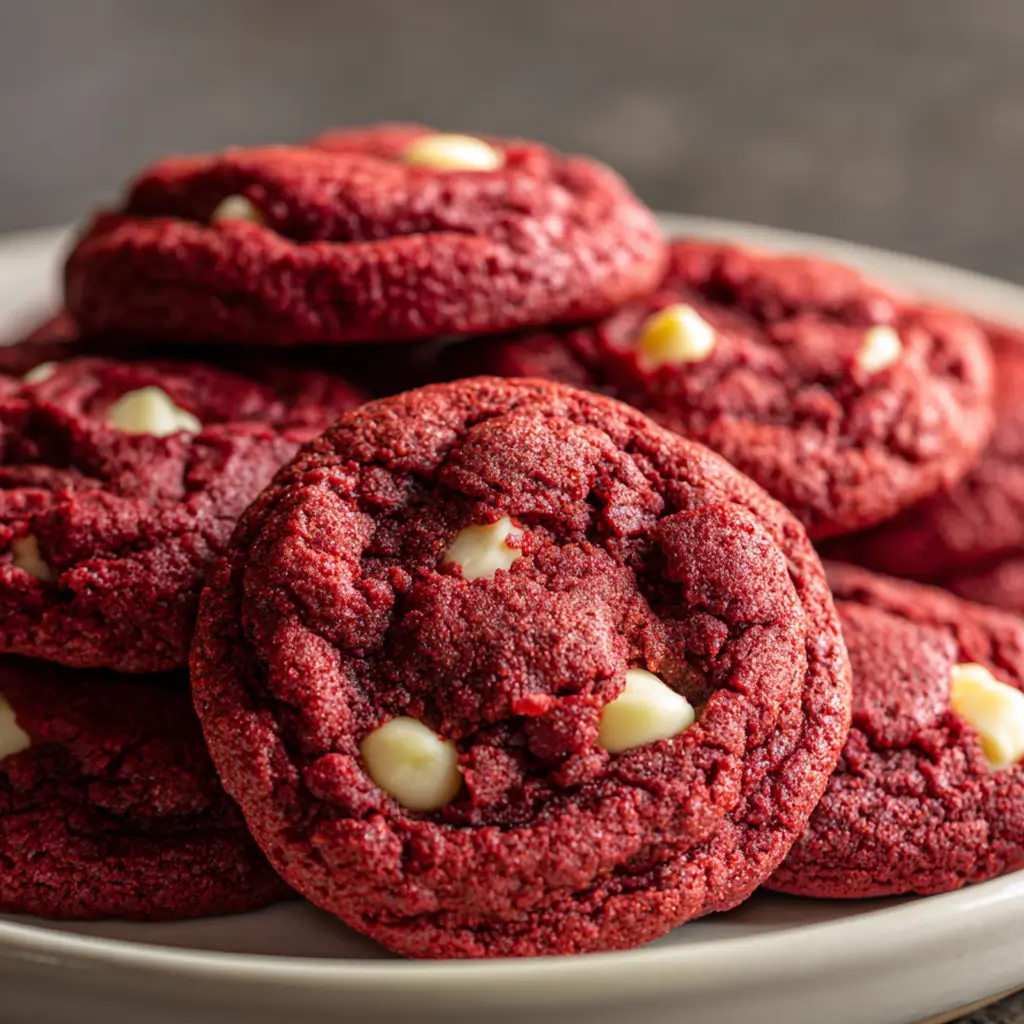
Red Velvet Cookies combine the beauty of red velvet cake with the chewiness of a classic cookie. They’re soft, rich, and slightly chocolatey, studded with creamy white chocolate chunks that melt into pockets of sweetness. Vibrant and decadent, these cookies make a stunning addition to any celebration from Valentine’s Day to holiday cookie plates but they’re just as welcome on an ordinary afternoon with a cup of coffee.
Their striking color, buttery texture, and hint of cocoa make these cookies as gorgeous as they are delicious. The best part? They come together easily with simple pantry ingredients and bake in under 15 minutes.
Ingredients
- 125 g unsalted butter, softened
- 100 g light brown sugar
- 75 g white granulated sugar
- 1 medium egg
- 1 teaspoon vanilla extract
- 1 teaspoon red food coloring
- 265 g plain flour
- 15 g cocoa powder
- 1½ teaspoons baking powder
- ½ teaspoon bicarbonate of soda
- ½ teaspoon sea salt
- 300 g white chocolate chips (or chopped white chocolate)
Step-by-Step Method
Step 1: Cream the butter and sugars
In a large mixing bowl, beat together the softened butter, brown sugar, and white sugar using a hand or stand mixer on medium speed for 2–3 minutes. The mixture should look fluffy and pale, which means air has been incorporated for a lighter texture.
Step 2: Add wet ingredients
Mix in the egg, vanilla extract, and red food coloring. If you prefer a deeper hue, add a little more color one drop at a time until you reach your desired shade of red. Beat again until the mixture is smooth and evenly tinted.
Step 3: Combine the dry ingredients
In a separate bowl, whisk together the flour, cocoa powder, baking powder, bicarbonate of soda, and sea salt. The cocoa powder provides that subtle chocolate flavor that defines red velvet’s signature taste.
Step 4: Bring the dough together
Add the dry ingredients to the wet mixture in two parts, mixing gently between additions. Stop once no streaks of flour remain. The dough will be thick and slightly sticky perfect for chewy cookies.
Step 5: Fold in the white chocolate
Gently stir in the white chocolate chips until they’re well distributed. Reserve a small handful to press into the tops of the cookies before baking for a professional-looking finish.
Step 6: Chill the dough
Cover the dough and chill it in the refrigerator for at least 30 minutes. This resting step firms up the butter, prevents spreading, and enhances the flavor. You can also let it chill overnight if making ahead.
Step 7: Bake
Preheat the oven to 350°F (175°C) and line two baking sheets with parchment paper. Roll tablespoon-sized portions of dough into balls and place them at least 2 inches apart on the trays. Press a few extra white chocolate chips on top of each.
Bake for 10–12 minutes, or until the edges are just set but the centers still appear slightly soft. They’ll continue setting as they cool, giving you that perfect chewy texture.
Step 8: Cool and enjoy
Let the cookies cool on the baking sheet for 5 minutes before transferring them to a wire rack. Enjoy warm while the chocolate is still melty, or let them cool completely for optimal texture.
Expert Tips for Success

-
Room-temperature ingredients: Ensure the butter and egg are at room temperature before mixing this helps them blend together smoothly.
-
Chilling is key: Red velvet cookie dough can spread too much if it’s too soft. Chilling prevents thin, overly crisp cookies.
-
Measure accurately: Weighing ingredients (especially flour) guarantees consistent results every time.
-
Avoid overbaking: These cookies should stay soft in the center. Pull them out when the edges are set but the center looks slightly underdone.
-
Use gel food coloring: Gel or paste food coloring gives a vibrant red hue without thinning out the dough.
Tasty Variations to Try
-
Cream cheese accent: Add a drizzle of cream cheese glaze once the cookies are cooled for that classic red velvet flavor pairing.
-
Dark chocolate chips: Swap white chocolate for dark or semi-sweet chips for a richer, deeper flavor contrast.
-
Holiday twist: Stir in red and white candy-coated chocolates or sprinkles for festive flair.
-
Mini version: Roll smaller dough balls to make bite-sized cookies bake for 8 minutes for perfect texture.
-
Sandwich cookies: Spread a bit of cream cheese frosting between two cooled cookies for indulgent red velvet sandwich cookies.
Frequently Asked Questions
Can I make the dough ahead?
Yes! The dough can be refrigerated for up to 48 hours. Chilled dough also gives deeper flavor and thicker cookies once baked.
Do these freeze well?
Absolutely. Freeze baked cookies for up to 2 months or freeze raw dough balls and bake directly from frozen, adding an extra 1–2 minutes to bake time.
Can I use liquid food coloring?
You can, but it’s less concentrated and may alter dough texture slightly. If using liquid, reduce milk or add a teaspoon more flour to balance the moisture.
Why aren’t my cookies bright red?
Color intensity depends on your food coloring. Gel or paste colors produce the best tone once baked. Also, cocoa powder naturally mutes red, so go slightly brighter in the raw dough stage.
How should I store them?
Store cooled cookies in an airtight container at room temperature for up to 5 days. For extra softness, place a slice of bread in the container it keeps them from drying out.
Print
Red Velvet Cookies
- Total Time: 57
- Yield: 20 cookies 1x
- Diet: Vegetarian
Description
Soft, buttery, and slightly chocolatey red velvet cookies studded with creamy white chocolate chunks. A festive, chewy treat perfect for holidays or anytime indulgence.
Ingredients
- 125 g unsalted butter, softened
- 100 g light brown sugar
- 75 g white granulated sugar
- 1 medium egg
- 1 teaspoon vanilla extract
- 1 teaspoon red food coloring (gel preferred)
- 265 g all-purpose flour
- 15 g cocoa powder
- 1½ teaspoons baking powder
- ½ teaspoon baking soda
- ½ teaspoon sea salt
- 300 g white chocolate chips or chopped white chocolate
Instructions
- Beat softened butter, brown sugar, and white sugar for 2-3 minutes until fluffy and pale.
- Mix in egg, vanilla extract, and red food coloring until evenly tinted.
- Whisk flour, cocoa, baking powder, baking soda, and salt in a separate bowl.
- Add dry ingredients to wet in two parts, mixing just until no flour streaks remain.
- Fold in white chocolate chips, reserving some to press on top before baking.
- Cover and chill dough at least 30 minutes (overnight for thicker cookies).
- Preheat oven to 350°F (175°C). Roll tablespoon-sized dough balls, spaced 2 inches apart, press extra chocolate chips on top.
- Bake 10-12 minutes until edges are set and centers slightly soft. Cool 5 minutes on trays, then transfer to wire racks.
Notes
Use room temperature butter and egg for smooth mixing.
Chill dough to prevent spreading.
Avoid overbaking; cookies should be soft inside.
Use gel food coloring to avoid thinning dough and ensure vibrant color.
Weigh ingredients for consistent results.
- Prep Time: 15
- Cook Time: 12
- Category: Dessert
- Method: Baking
- Cuisine: American
Nutrition
- Serving Size: 1 cookie
- Calories: 180
- Sugar: 16g
- Sodium: 100mg
- Fat: 9g
- Saturated Fat: 5g
- Unsaturated Fat: 3g
- Carbohydrates: 24g
- Fiber: 1g
- Protein: 2g
- Cholesterol: 25mg
Keywords: red velvet cookies, white chocolate red velvet, holiday cookies, chewy red velvet dessert, valentine cookies, bakery-style red velvet