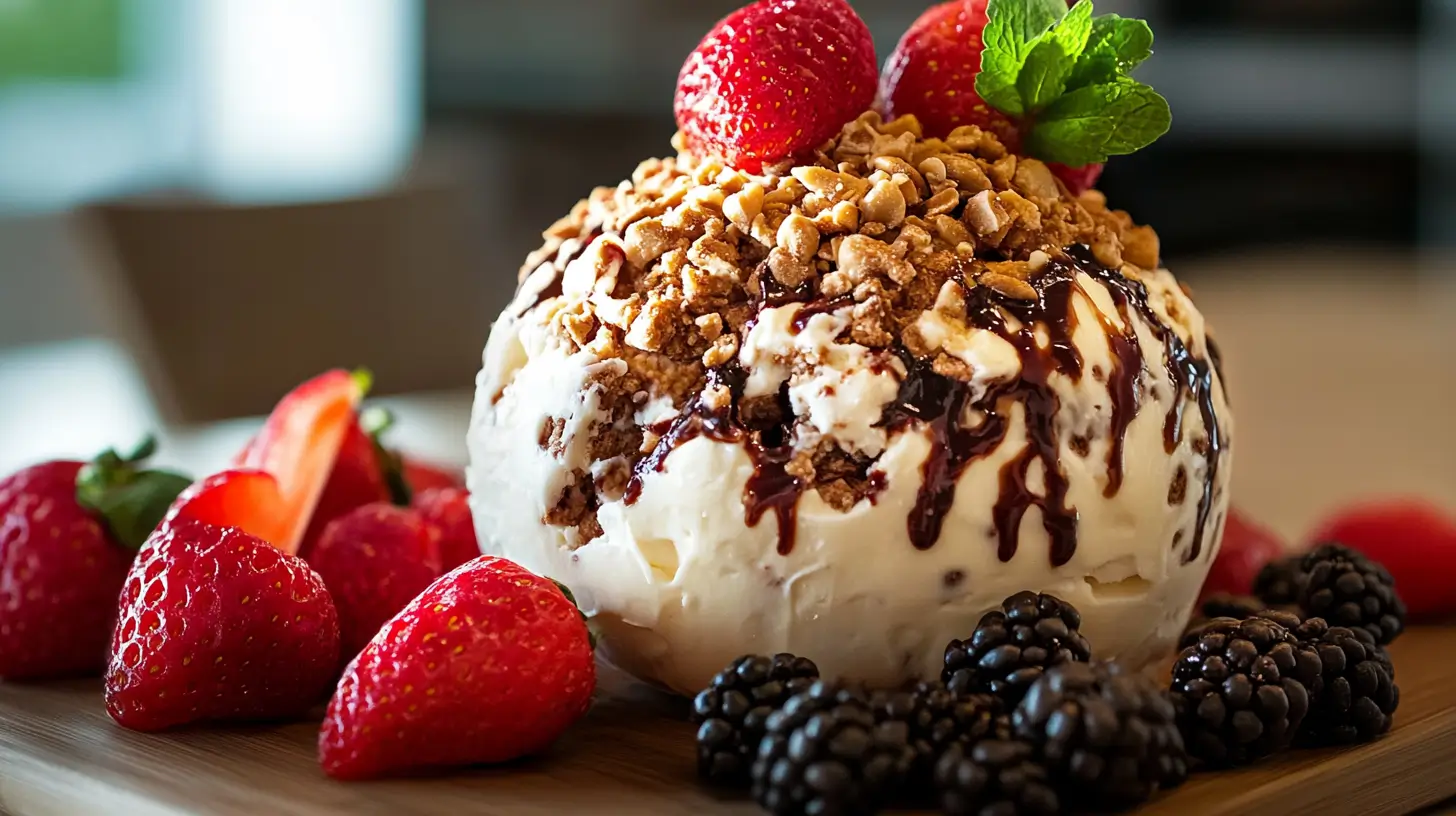
I never set out to make a dessert cheese ball, but sometimes, the best recipes come from happy accidents. It all started one evening when I was scrambling to whip up a last-minute dessert for a gathering. I had cream cheese, chocolate chips, and a few pantry staples, but not enough time for baking. That’s when inspiration struck why not turn a classic cheese ball into a sweet, scoopable treat?
After a few tweaks, I rolled the mixture into a ball, coated it in chocolate chips, and served it with graham crackers. To my surprise, it was the star of the night. The creamy texture, rich sweetness, and crunchy outer layer had everyone coming back for more. Friends begged for the recipe, and just like that, my accidental creation became a party staple.
What makes this dessert so special? It’s easy, requires no baking, and can be made ahead of time ideal for busy schedules. Plus, it’s endlessly customizable. Want a nutty twist? Roll it in chopped pecans. Love cookies? Crushed Oreos make an excellent coating. The possibilities are endless, and that’s what makes this recipe so exciting.
Whether you’re making it for a casual get-together or a festive holiday spread, this dessert cheese ball will quickly become one of your go-to desserts. Let’s explore why it’s so special and how you can make it your own!
What Makes This Dessert Cheese Ball Special
Unlike traditional cheese balls, which are usually savory and packed with herbs, nuts, or spices, a dessert cheese ball transforms the concept into something delightfully sweet. But what makes this recipe truly special?
1. No-Bake and Foolproof
This recipe is completely no-bake, making it perfect for when you need a quick dessert but don’t want to turn on the oven. The simple mixing process ensures that even beginners can nail it on the first try.
2. Creamy Yet Firm Texture
A great dessert cheese ball should have the perfect balance between creamy and firm. This version uses just the right ratio of cream cheese to sweeteners, preventing a runny or overly soft consistency.
3. Endless Flavor Possibilities
One of the best things about this recipe is its adaptability. Whether you love chocolate chips, crushed cookies, or a hint of cinnamon, you can easily customize the mix-ins and coatings to fit your taste. If you’re a fan of mix-ins, check out these Chocolate Chip Cupcakes for another chocolatey dessert idea.
4. Perfect for Any Occasion
This dessert isn’t just for parties. It works well for holidays, birthdays, or even as a fun weekend treat. Plus, it’s a guaranteed crowd-pleaser that both kids and adults will love.
5. Make-Ahead Convenience
The dessert cheese ball actually tastes better after chilling, as the flavors have more time to meld together. This means you can prepare it a day in advance, making it a stress-free addition to your dessert lineup.
Key Ingredients
The success of a dessert cheese ball depends on choosing the right ingredients. Each component plays a crucial role in achieving the perfect texture and taste.
Core Ingredients
1. Cream Cheese (The Base of the Recipe)
Cream cheese is the foundation of this dessert, providing a rich and creamy texture. It’s essential to use full-fat cream cheese for the best consistency. Avoid low-fat versions, as they can make the cheese ball too soft. If you love cream cheese desserts, check out these Strawberry Cheesecake Bars for another delicious treat.
2. Powdered Sugar (Sweetness & Stability)
Unlike granulated sugar, powdered sugar dissolves smoothly into the cream cheese, ensuring a velvety consistency without any graininess. It also helps firm up the mixture slightly, making it easier to shape.
3. Vanilla Extract (Depth of Flavor)
Vanilla enhances the sweetness and rounds out the flavors. You can also experiment with almond or maple extract for a unique twist.
4. Chocolate Chips (Texture & Sweetness)
Mini chocolate chips work best because they distribute evenly throughout the mixture without overpowering each bite. You can swap them for white chocolate, peanut butter chips, or even toffee bits. If you’re a chocolate fan, you might also love these Chocolate Covered Dates for another chocolate-infused snack!
Optional Additions
1. Chopped Nuts
For extra crunch, consider rolling your cheese ball in finely chopped pecans, walnuts, or almonds. This adds a contrast in texture and enhances the flavor.
2. Crushed Cookies or Graham Crackers
A cookie coating creates a fun, crunchy exterior. Crushed Oreos, graham crackers, or shortbread cookies all work beautifully.
3. Caramel or Chocolate Drizzle
Drizzling caramel or melted chocolate over the finished cheese ball makes it look extra decadent while adding another layer of flavor.
4. Cocoa Powder or Cinnamon
A light dusting of cocoa powder or cinnamon can elevate the taste profile and add a bit of warmth to the overall flavor.
How to Make the Dessert Cheese Ball
Making a dessert cheese ball is surprisingly simple. With just a few steps, you’ll have a sweet, creamy, and crowd-pleasing treat ready to go.
Step 1: Prepare the Cream Cheese Mixture
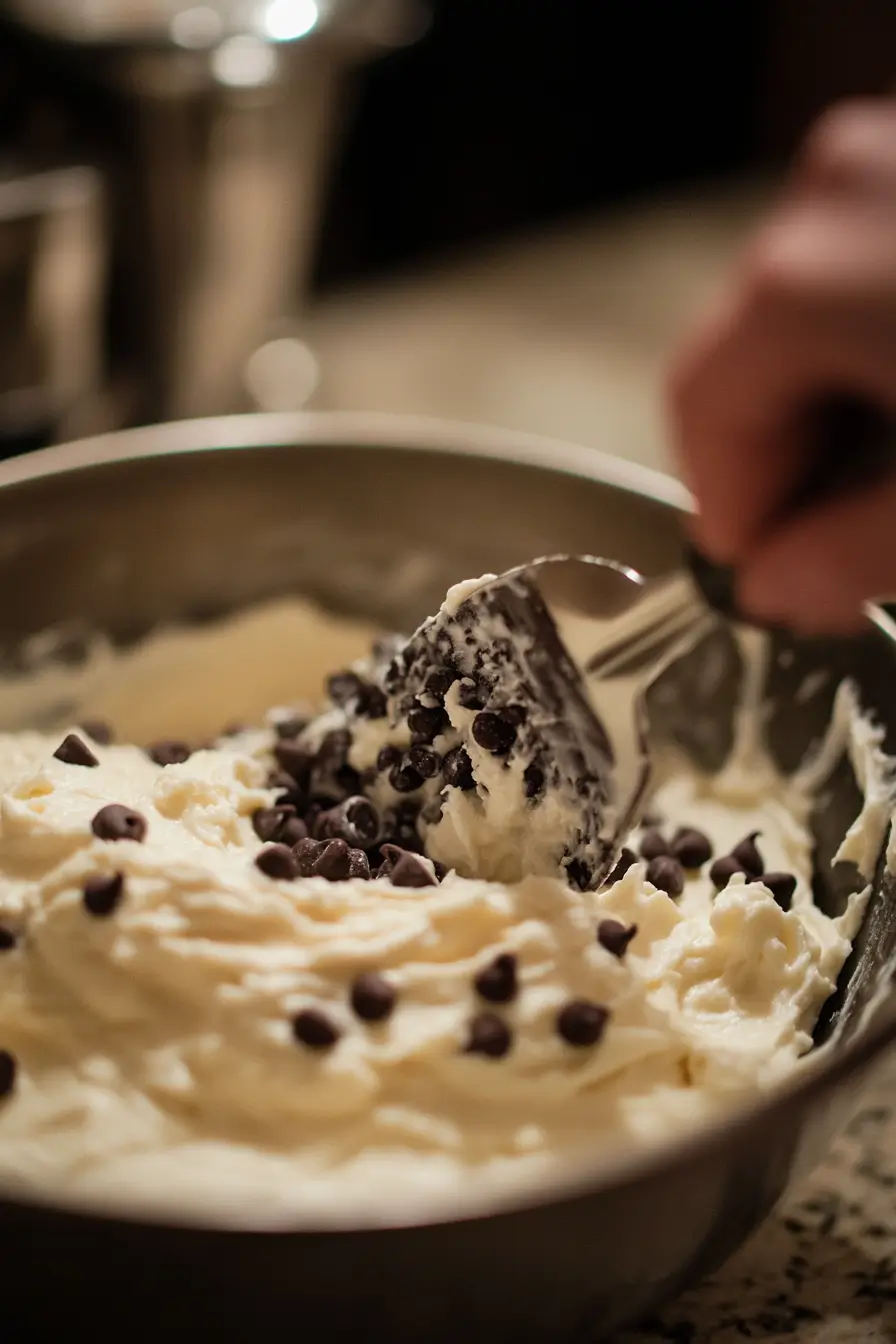
Start by softening the cream cheese. This ensures a smooth, lump-free texture and makes mixing easier. Using a hand mixer or stand mixer, beat the cream cheese until it’s light and fluffy.
Next, gradually add powdered sugar. This step is crucial for achieving the right sweetness without making the mixture too thin. Stir in vanilla extract for a deeper flavor.
Step 2: Add the Mix-Ins
Once the base is creamy and smooth, fold in the chocolate chips. Mini chocolate chips work best because they distribute evenly, ensuring every bite is perfectly balanced. If you’re adding nuts, crushed cookies, or other ingredients, now is the time to mix them in.
Step 3: Shape and Chill
Lay a piece of plastic wrap on the counter and spoon the cream cheese mixture onto it. Gather the edges of the plastic wrap and shape the mixture into a rough ball. Don’t worry if it’s not perfect chilling will firm it up.
Refrigerate for at least two hours, or overnight for the best consistency. This helps the flavors meld and makes the ball easier to handle.
Step 4: Coat the Cheese Ball
Before serving, roll the cheese ball in chocolate chips, chopped nuts, or crushed cookies to create a decorative and flavorful outer layer. This step adds texture and makes the cheese ball look more appealing.
Step 5: Serve and Enjoy
Let the dessert cheese ball sit at room temperature for about 10–15 minutes before serving. This makes it easier to spread onto dippers like graham crackers, pretzels, or fresh fruit.
My Best Dessert Cheese Ball Tips
Even though this recipe is simple, a few key techniques can take your dessert cheese ball to the next level.
1. Use Full-Fat Cream Cheese for the Best Texture
Full-fat cream cheese provides a rich, creamy consistency that holds its shape well. Low-fat versions contain more moisture, which can make the cheese ball too soft.
2. Chill for the Perfect Firmness
Refrigerating for at least two hours (or overnight) allows the flavors to develop and ensures the ball stays firm when serving. If you’re in a hurry, you can place it in the freezer for 30 minutes, but don’t leave it too long, or it will be too hard to scoop.
3. Choose the Right Coating
Rolling the cheese ball in chocolate chips or crushed cookies adds visual appeal and a delicious crunch. However, if you prefer a softer outer layer, try rolling it in shredded coconut or finely ground nuts.
4. Adjust Sweetness to Your Taste
If you prefer a less sweet dessert, reduce the powdered sugar slightly. You can also balance the sweetness with a pinch of salt or a splash of citrus juice for contrast.
5. Make It Ahead for Convenience
A dessert cheese ball is a great make-ahead treat. Prepare it the night before, and simply roll it in toppings before serving. It will keep well in the fridge for up to three days.
Variations of Dessert Cheese Ball
One of the best things about a dessert cheese ball is how easy it is to customize. Whether you prefer chocolate, fruit, or a mix of flavors, there’s a version for everyone. Here are a few fun variations to try.
1. Chocolate Lovers’ Dessert Cheese Ball
If you can’t get enough chocolate, this variation is for you. Instead of using just chocolate chips, mix in cocoa powder for a deeper, richer taste. Roll the cheese ball in mini chocolate chips and drizzle it with melted chocolate before serving.
2. Fruity Cheesecake-Inspired Cheese Ball
For a lighter, fruitier option, mix in dried strawberries, crushed freeze-dried raspberries, or finely chopped dried cherries. The slight tartness of the fruit balances the sweetness of the cheese ball perfectly.
For the coating, crushed graham crackers make it taste like a classic cheesecake.
3. Cookies & Cream Cheese Ball
Oreo lovers, this one is for you! Crush Oreos and mix them into the cream cheese mixture. Then, roll the cheese ball in more crushed Oreos for a crunchy outer layer.
For an extra touch, drizzle with white chocolate or add a bit of vanilla extract to mimic the classic cookies-and-cream flavor.
4. Peanut Butter Bliss Cheese Ball
If you love the combination of peanut butter and chocolate, swap out part of the cream cheese for smooth peanut butter. Use Reese’s Pieces or chopped peanut butter cups for the coating.
5. Holiday-Themed Cheese Balls
Want to make this dessert festive? Try these holiday-inspired ideas:
- Pumpkin Spice: Add pumpkin pie spice and roll the ball in crushed gingersnaps.
- Christmas Peppermint: Mix in crushed peppermint candies and roll in white chocolate chips.
- Valentine’s Day: Use red and pink sprinkles in the coating for a fun, romantic twist.
How to Serve Dessert Cheese Ball
Presentation matters just as much as taste! Here’s how to serve your dessert cheese ball in the best way possible.
1. The Best Dippers for Your Cheese Ball
Pairing your cheese ball with the right dippers enhances the overall flavor and experience. Here are some of the best options:
- Graham crackers: Their slight crunch and subtle sweetness pair beautifully.
- Pretzels: The salty-sweet contrast is always a hit.
- Vanilla wafers: A light and buttery option.
- Apple slices: A refreshing and slightly tart pairing.
- Shortbread cookies: Perfect for an indulgent treat.
2. How to Style Your Cheese Ball for Guests
To make your dessert cheese ball the star of the table, try these presentation tips:
- Place it on a decorative platter with dippers arranged neatly around it.
- Drizzle caramel, chocolate, or fruit syrup over the top for extra appeal.
- Sprinkle a pinch of sea salt or cinnamon on top for a gourmet touch.
- Use a serving knife to make it easy for guests to spread onto their dippers.
3. Can You Turn This Into Mini Cheese Balls?
Yes! If you want a fun twist, divide the mixture into mini cheese balls. This is great for portion control and makes serving even easier.
Roll each mini ball in different coatings like crushed nuts, sprinkles, or cookie crumbs. Guests can grab their favorite flavor without needing a knife.
Common Mistakes & Fixes
Even though a dessert cheese ball is easy to make, a few common mistakes can affect the final result. Here’s how to avoid them and ensure your cheese ball turns out perfectly every time.
1. The Cheese Ball Is Too Soft to Roll
A cheese ball that won’t hold its shape usually means the mixture is too warm or has too much moisture.
How to fix it:
- Chill the mixture for at least two hours before shaping.
- If it’s still too soft, mix in a little more powdered sugar to firm it up.
- Avoid using low-fat cream cheese, as it contains more moisture than full-fat versions.
2. The Cheese Ball Is Too Sweet
Since a dessert cheese ball is meant to be sweet, it can be easy to overdo the sugar.
How to fix it:
- Reduce the powdered sugar slightly if you prefer a milder sweetness.
- Add a pinch of salt to balance the flavors.
- Mix in a bit of lemon zest or citrus juice for a touch of brightness.
3. The Coating Won’t Stick
If your chocolate chips, nuts, or crushed cookies aren’t sticking to the cheese ball, the surface might be too dry.
How to fix it:
- Let the cheese ball soften slightly before rolling in the coating.
- Press the coating gently but firmly onto the surface.
- Lightly brush the cheese ball with a little honey or melted chocolate to help the coating adhere.
4. The Flavor Isn’t Strong Enough
If your cheese ball tastes bland, it might need an extra boost of flavor.
How to fix it:
- Increase the vanilla extract or add a teaspoon of flavored extracts like almond or coconut.
- Try mixing in a pinch of cinnamon, cocoa powder, or espresso powder for depth.
- Use high-quality chocolate chips or nuts for the best taste.
FAQs
Got questions about making and storing a dessert cheese ball? Here are some of the most frequently asked questions and expert answers.
How long can I store the chocolate chip cheese ball?
A dessert cheese ball can be stored in an airtight container in the refrigerator for up to three to four days. Make sure it’s tightly wrapped in plastic wrap to prevent it from absorbing fridge odors.
Can I make the cheese ball ahead of time?
Yes! A dessert cheese ball actually tastes better when made ahead because the flavors have time to blend. You can prepare it up to 24 hours in advance and store it in the fridge until serving.
If you’re rolling it in a crumbly coating like cookies or nuts, wait to coat it until just before serving to keep it fresh and crisp.
Why is my cheese ball too soft to roll?
A soft cheese ball is usually due to too much moisture or insufficient chilling time.
How to fix it:
- Ensure the mixture is well-chilled before shaping.
- Use full-fat cream cheese for better structure.
- If it’s still too soft, mix in more powdered sugar or crushed cookies to firm it up.
Can I freeze a dessert cheese ball?
Yes, you can freeze a dessert cheese ball for up to one month. Wrap it tightly in plastic wrap and place it in an airtight container. When ready to serve, let it thaw in the refrigerator overnight and roll it in the coating before serving.
Print
Dessert cheese ball
- Total Time: 2 hours 10 minutes
- Yield: 8 servings 1x
- Diet: Vegetarian
Description
This Dessert Cheese Ball is a rich, creamy, and indulgent treat that comes together with just a few simple ingredients. It’s a no-bake, make-ahead dessert that’s perfect for parties, holiday gatherings, or any occasion. With a luscious cream cheese base, sweet mix-ins, and a crunchy outer coating, it’s the ultimate crowd-pleaser. Serve it with graham crackers, pretzels, or fresh fruit for a delightful sweet treat!
Ingredients
Base:
- 8 oz cream cheese, softened
- 1/2 cup unsalted butter, softened
- 3/4 cup powdered sugar
- 1 tsp vanilla extract
Mix-ins:
- 1/2 cup mini chocolate chips
Coating Options:
- 1/2 cup mini chocolate chips
- 1/2 cup crushed cookies (Oreos, graham crackers, shortbread)
- 1/2 cup chopped nuts (pecans, walnuts, almonds)
- 1/4 cup shredded coconut (optional)
- 1/4 cup sprinkles (optional)
Serving Options:
- Graham crackers
- Pretzels
- Apple slices
- Vanilla wafers
- Shortbread cookies
Instructions
- Prepare the Cream Cheese Mixture
In a large mixing bowl, beat the softened cream cheese and butter together until smooth and creamy. Gradually add the powdered sugar and vanilla extract, mixing until fully incorporated. - Fold in the Mix-ins
Gently fold in the mini chocolate chips, ensuring even distribution throughout the mixture. - Shape the Cheese Ball
Transfer the mixture onto a large piece of plastic wrap. Wrap it tightly and shape it into a ball. Refrigerate for at least 2 hours, or overnight for best results. - Coat the Cheese Ball
Before serving, roll the cheese ball in mini chocolate chips, crushed cookies, chopped nuts, or any preferred coating. Press gently to adhere the coating. - Serve and Enjoy
Let the cheese ball sit at room temperature for 10–15 minutes before serving. Serve with graham crackers, pretzels, apple slices, or other dippers of choice.
Notes
- Use full-fat cream cheese for the best texture and structure.
- Chilling is crucial to ensure the cheese ball holds its shape.
- If the coating doesn’t stick well, let the cheese ball soften slightly before rolling.
- Customize with different mix-ins like crushed peppermint, peanut butter chips, or dried fruit.
- Can be made ahead and stored in the fridge for up to 3 days.
- Freezing option: Wrap tightly and freeze for up to 1 month. Thaw in the fridge before rolling in coating.
- Prep Time: 10 minutes
- Cook Time: 2 hours
- Category: Dessert
- Method: No-Bake
- Cuisine: American
Nutrition
- Serving Size: 2tbsp
- Calories: 210
- Sugar: 15g
- Sodium: 95mg
- Fat: 13g
- Saturated Fat: 8g
- Unsaturated Fat: 4g
- Trans Fat: 0g
- Carbohydrates: 21g
- Fiber: 1g
- Protein: 2g
- Cholesterol: 35mg
Keywords: Dessert cheese ball
